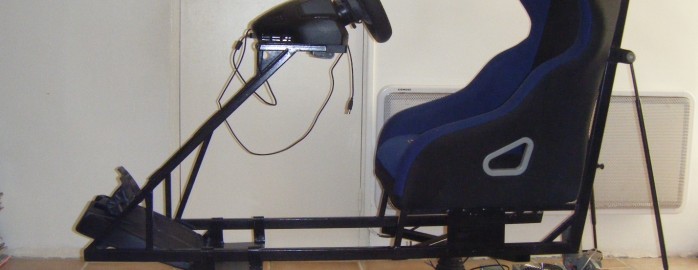
In this article, you will find the step-by-step tutorial you can follow to achieve a DIY 2DOF simulator for 700€ : dozen of pictures, videos…
This is the link to my original post from Gamoover:
http://www.gamoover.net/Forums/index.php?topic=27617.0
Same link: English translated by google
[gard]
The concept:
A dynamic simulator which integrates the driver, the seat, pedals and steering wheel (but not the screens!)
The two axes (2DOF: Two Degrees of Freedom) are Roll and Pitch.
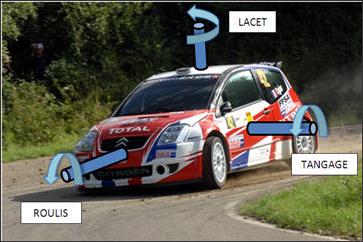
The principle is inspired by the commercial model from Frex http://www.frex.com
but with gearmotors (wiper motor + rod) replacing the electric linear actuators.
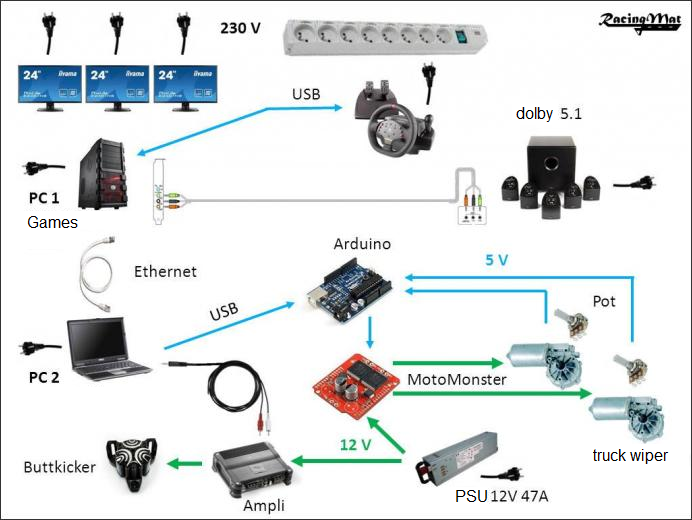
A glogal overview of the electrical stuff:
Simtools
This simulator requires an additional software to extract games telemetry data and send the data to the motors: Simtools can be downloaded here
Two computers:
Pc #1 (graphic card „7970 lightning“, Windows 7) :
– The car games (Dirt3, rFactorLite and Richard Burns Rally)
– SimTools GameEngine
PC #2 (Recycling) connected via a crossover cable RJ45 to PC #1
– SimTools GameManager
Electronic cards : Arduino + Motomonster
An Arduino card linked to computer #2 with a USB cable.
The Arduino controls the MotoMonster shield „motor driver board“.
The power board Sparkfun „MotoMonster“ drives the two motors (12V 47A = 575W) according to the instructions of the Arduino (5V 5mA = 25 mW).
For simplicity, the motor driver board is equivalent to 4 relays:
driving the right motor forward this means mounting the right side,
driving the right motor in the other direction this means lowering the right side,
driving the left motor forward this means mounting the left side,
driving the left motor in the other direction this means lowering the left side,
An arduino program (C language)
This program interprets the data sent via serial port by SimTools and sends it to the motor control board.
It performs a feedback control by reading the values of the potentiometer coupled to the motors :
-> The actual position is compared to the setpoint, and this will create a new updated order sent to the MotoMonster card.
This feedback loop is performed every 80 ms.
12V power supply and DC motors
A heavy 12V Power Supply Unit about 30A. Electric Motors
2 Truck Wiper Motors for actuating the movable platform, with their positioning potentiometer (for feedback).
Structure in rectangular steel tube:
– the frame
the frame rests on the ground and supports the movable platform via a motor drive shaft (U joint).
– the moving part: the „cockpit“
– A true racing bucket seat (tubular). The fiber seats are lighter but more expensive.
– A harness! important to feel the seat movements and for realism of immersion
– Force Feedback steering wheel and pedals
The dimensions
Here are the quotations to give you an idea :
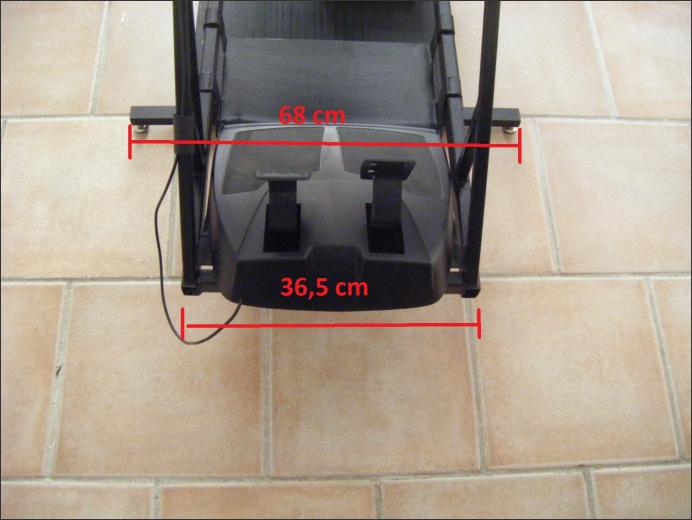
The step-by-step pictures:
Structure
It was very convenient to have the bucket seat’s mounting plate: I drilled the structure easily!
Power Drill and a conical tool to adjust the hole to good diameter
Take care to ensure the shaft ’s squareness : it has to be vertical !
http://gamoovernet.pixhotel.fr/pics_gamoovernet690px/20130401124851-RacingMat-cardan-et-chassis-3-.JPG
Then I crossed the bars at 45 ° to triangulate my frame :
The gimbal (U joint) is blocked in rotation along the yaw axis.
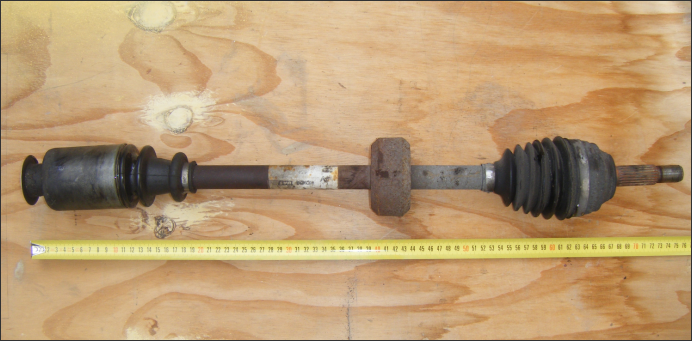
the gimbal assembly:
which gives this 🙂
and this
